
What this guide helps you do
Connect a supported provider, test the exact workflow you need, and distinguish saved credentials from a verified connection.
Before you start
- Use provider credentials created for this workspace and purpose.
- Know whether the connection is for payments, email, storage, or another supported workflow.
- Keep secrets out of screenshots, tickets, and article text.
Step by step
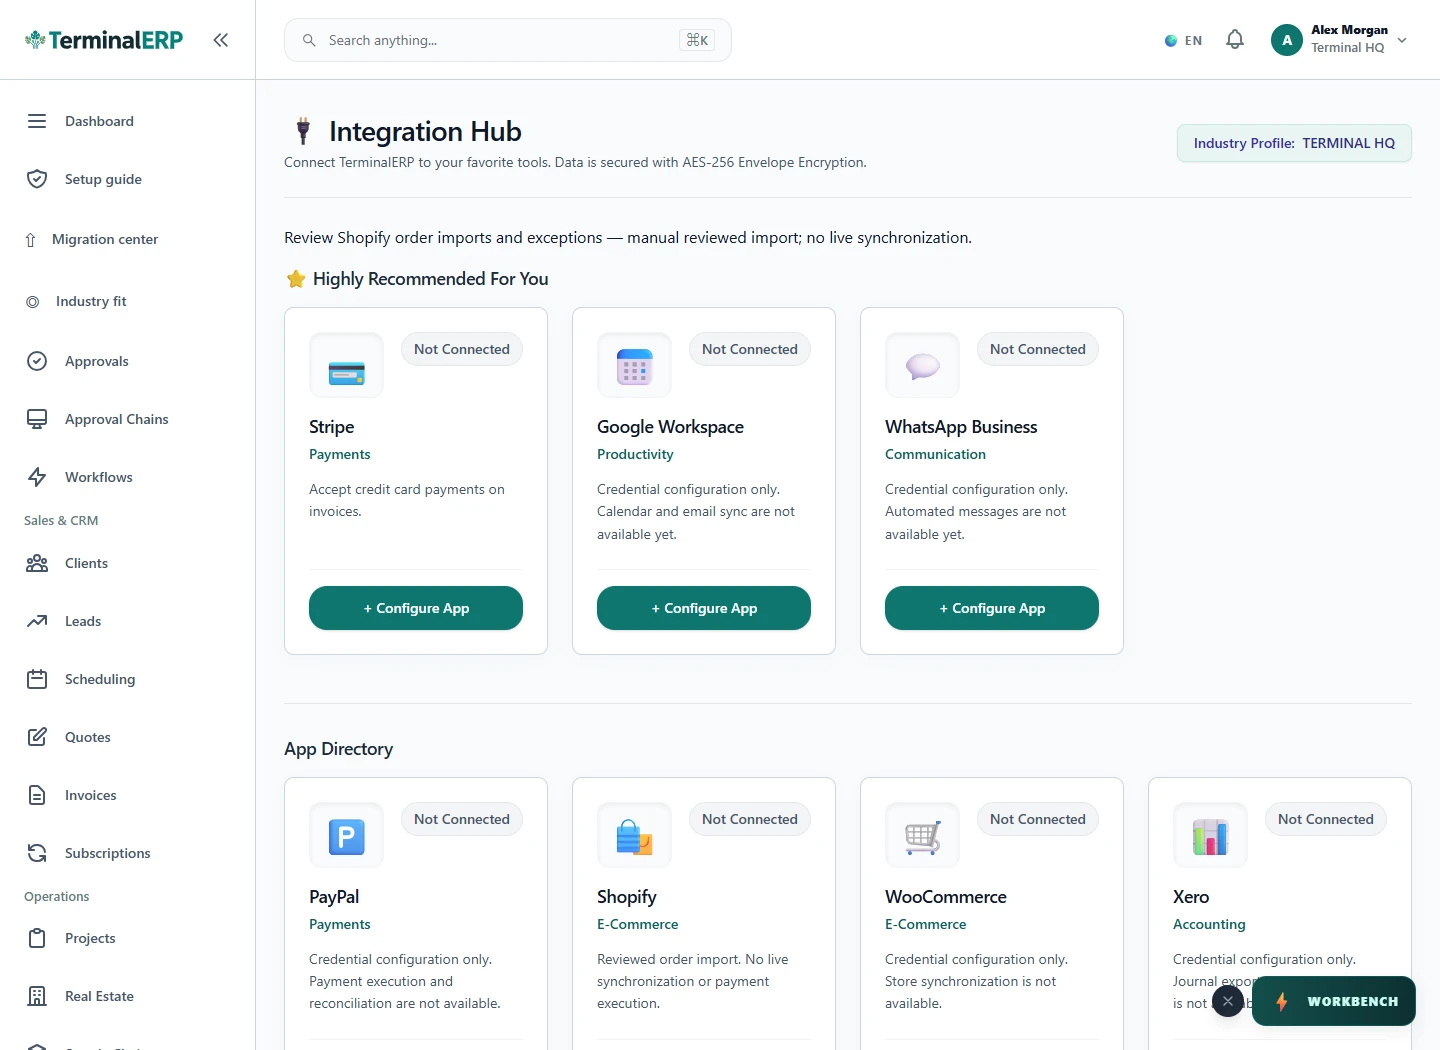
- Open Integrations and choose the provider.
- Enter the required credentials and configuration using the secure fields.
- Save the connection, then run the available verification or a low-risk end-to-end test.
- Review the resulting status and the target provider account.
- If the test fails, confirm environment, account permissions, callback addresses, and provider-side restrictions before retrying.
Find the workflow on screen
Check the result
- Saved does not automatically mean verified.
- The test reaches the intended external account.
- The provider action and the TerminalERP record can be matched.
If something does not look right
- Stop before confirming, posting, paying, deleting, or retrying the same submission.
- Check the workspace, record identifier, date range, status, permissions, and source evidence.
- Refresh once and search for the record before creating a replacement, so a slow response does not produce a duplicate.
Common problems and what to check
- Saved credentials show no activity: verify the intended account, test/live environment and supported action. Saved is not the same as verified.
- Authentication fails: check provider-side permission and callback requirements. Replace secrets through secure fields, not an email or support ticket.
When to contact support
If the source evidence and permissions are correct but the result is still wrong, send the page address, record number, exact message, time of the attempt, expected result, and what you already checked. Never include passwords, API keys, payment-card details, or private provider secrets.